... use Data Shaper graphs in Data One contracts
Macro steps
Assuming that any type of Contract with any variable can be created, let's see the main steps that must be applied to use a Data Shaper graph in Data One:
- In Data One, the workflow with the Data Shaper Processor brick must exist. You can either use system workflow templates (useful and ready to use) or create ad-hoc workflows.
- For details, go to Creating Workflow Templates.
- If you create an ad-hoc workflow, these 2 properties must be valued for the Data Shaper Processor brick to work correctly:
- Cluster: you can either enter the Cluster name or create a specific variable (whose Type must be Cluster).
- Payload: you can either enter the Payload name or create a specific variable (whose Type must be Datashaper payload).
- At this level, the Graph that will be executed is not specified. It will be defined when creating the Contract as attribute of the Payload variable.
- In Data Shaper Designer or Data Shaper Server, define a Sandbox and one or more Graphs.
- For details, go to Data Shaper graphs.
- In Data One, create a Contract with an Action that uses the Sandbox and the Graph.
- For details, go to Creating a Contract.
- You can create Input, Output and Mediation Contracts performing infinite actions. Some examples?
- an Input Contract to read from a database
- an Output Contract to write to a database
- a Mediation Contract to copy a binary file from an input VFS to an output VFS
- a Contract to read a text file from an input VFS, add a TimeStamp and push the new file to an output VFS
- a Mediation Contract to convert a .csv input file to a .xlsx output file
- When the Contract is ready, as soon as the action is triggered by the expected event, you can check results in the Jobs section and in the Data Shaper Server Console. Moreover, logs can be checked in Monitoring > Logs selecting the Data Shaper Engine module.
Examples
Let's now see 3 examples of Contracts using a Data Shaper graph.
Input Contract reading a table from a database and producing a .csv file saved in DataOne
Prerequisites:
- the root node must be a DBReader and the leaf node a DataOneVFSWriter

- the graph must be designed in Data Shaper - you can see an example of the graph in this picture:
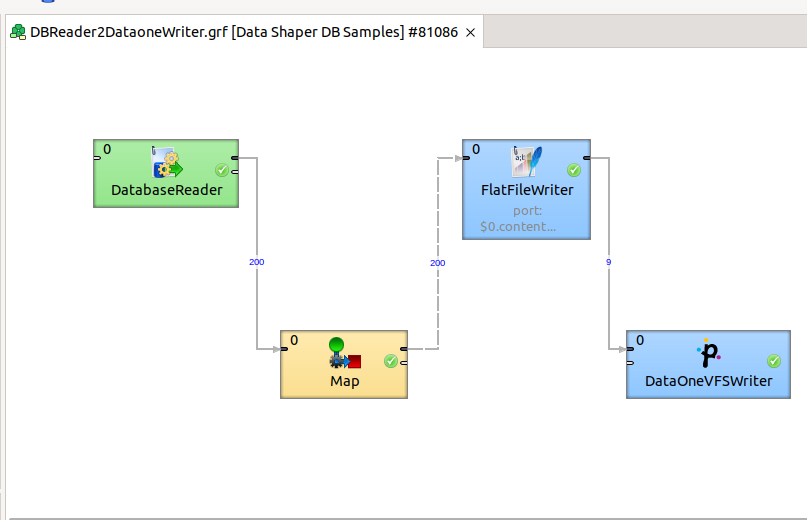
- the connection to the database is configured in the graph itself - it's a JDBC connection
These are the parameters configured:
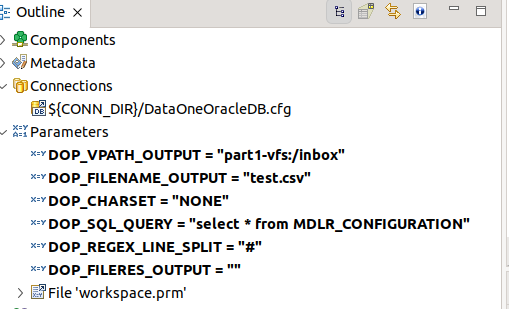
They will be proposed during the configuration of the contract (see below) and will be used in the graph engine.
In Input Contracts, the system_time_DS-pull and system_ondemand_DS-pull system workflow templates must be used to execute Data Shaper graphs to connect and read from a database. So, let's design an Input Contract.
- In Data One, go to Design > Contracts.
- In the New Contract window, assign a Name and a Description to the Contract and select Input in the Contract Type drop-down list.
- Click Continue.
- In the Actor drop-down list, select the Actor of your Contract and click Continue.
- In the Actions section, fill in these fields:
- Action name: you can leave Input-1.
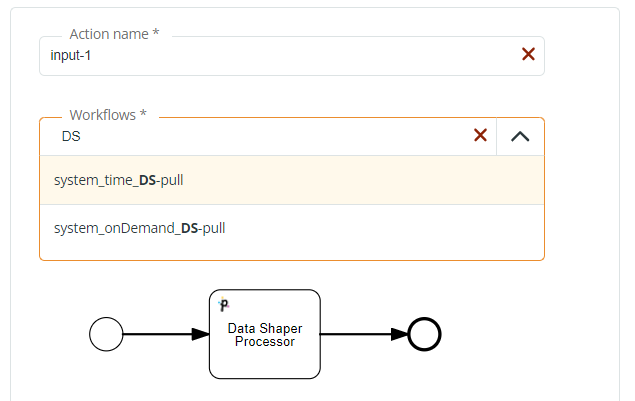
- Workflows: since you are defining a Data Shaper Input contract, you must select a Data Shaper system template, either
system_time_DS-pullorsystem_ondemand_DS-pull. Note that entering DS in the Search edit box, the 2 Data Shaper system templates will be listed. In this example, we go for thesystem_ondemand_DS-pulltemplate.
- Save your Contract.
- In the New Contract page, fill in these options:
- Cluster: select the cluster where Data Shaper will execute the graph. The selection of the Cluster will enable the Sandboxes list.
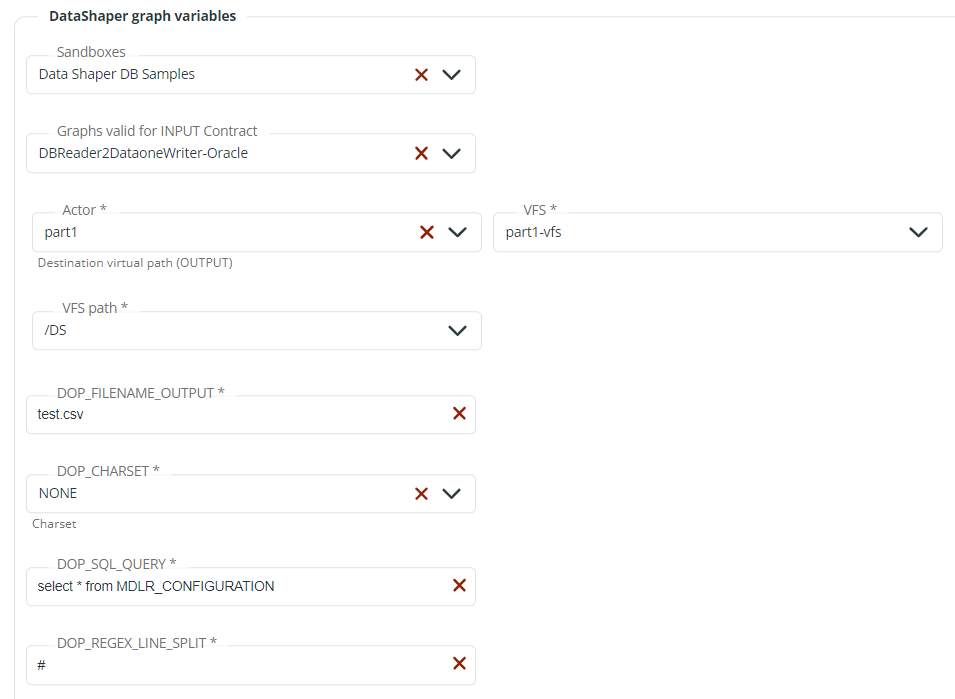
- DataShaper graph variables: select the Data Shaper Sandbox among those proposed in the Sandboxes dropdown list. Sandboxes are created, configured and listed in Monitoring > Data Shaper. Select the Data Shaper graph among those proposed in the Graphs valid for INPUT Contract dropdown list. The additional fields that appear are the same shown in the Prerequisites: VFS and VFS path, filename output, charset, SQL query and line split. If needed, these options can be edited.
You can now add another Action or save your Contract.
As soon as the action is triggered by the rest API, the content of the MDLR_CONFIGURATION table will be read and a test.csv file will be sent to the DS folder of the part1-VFS.
Results can be checked in the Jobs section and in the Data Shaper Server Console. Moreover, logs can be checked in the Logs > Data Shaper Engine module section.
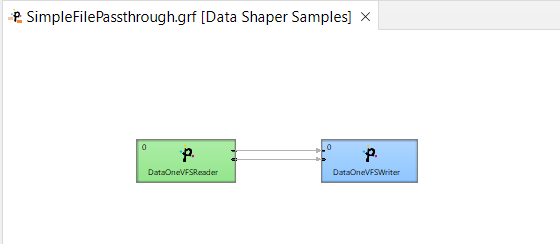
Mediation Contract copying a binary file from an input VFS to an output VFS
Prerequisites:
- the graph must be designed in Data Shaper - you can see an example of the graph in this picture:
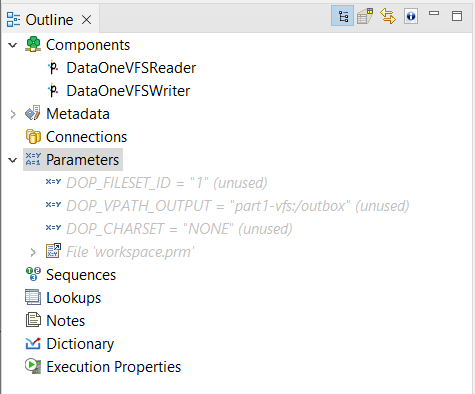
- these are the parameters configured:
- the workflow must be defined in Data One.
Let's now design a Mediation Contract:
- In Data One go to Design > Contracts.
- In the New Contract window, assign a Name and a Description to the Contract and select Mediation in the Contract Type drop-down list.
- Click Continue.
- In the Workflows drop-down list, select the Data Shaper workflow and click Save.
- In the Actions section, fill in these fields:
- Source Virtual Path: enter Actor, VFS and VFS path
- Cluster: select the cluster
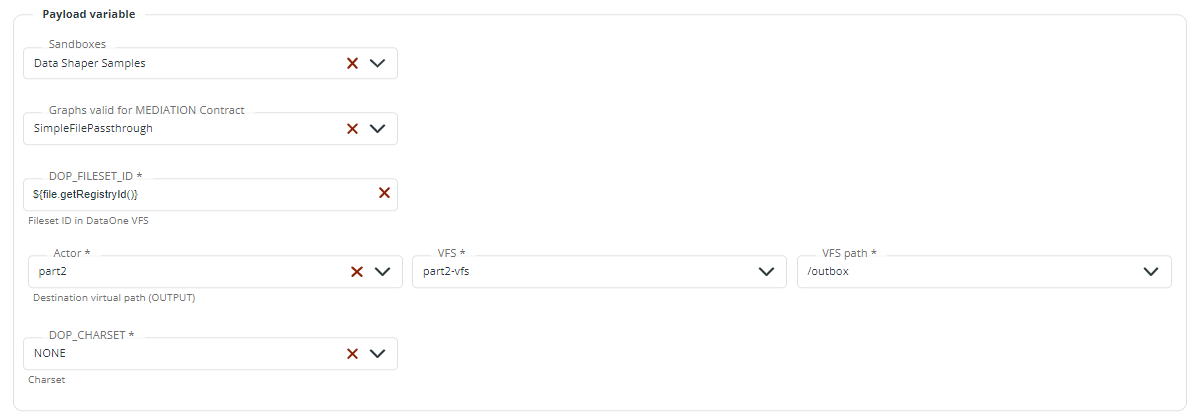
- Payload variables: select the Data Shaper Sandbox among those proposed in the Sandboxes dropdown list. Sandboxes are created, configured and listed in Monitoring > Data Shaper. Select the Data Shaper graph among those proposed in the Graphs valid for MEDIATION Contract dropdown list. The additional fields that appear are the same shown in the Prerequisites: FILESET_ID, output virtual path and charset fields will appear. If needed, these options can be edited.
- Save your Contract.
The Contract is now ready. As soon as the new file arrives, you can check results in the Jobs section and in the Data Shaper Server Console. Moreover, logs can be checked in Logs > Data Shaper Engine module.
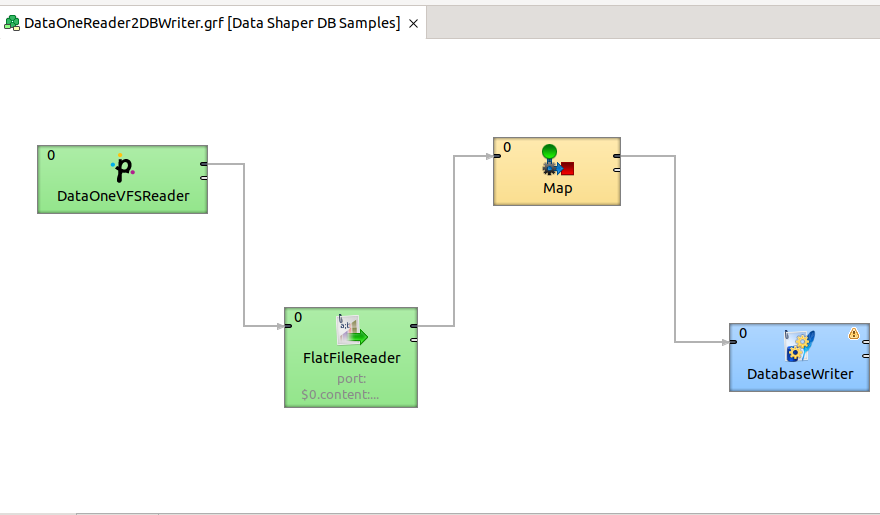
Output Contract reading a .csv file in DataOne and saving it on a database table
Prerequisites:
- the root node must be a DataOneVFSReader and the leaf node a DBWriter
- the graph must be designed in Data Shaper - you can see an example of the graph in this picture:
- the connection to the database is configured in the graph itself - it's a JDBC connection
We have configured these parameters:
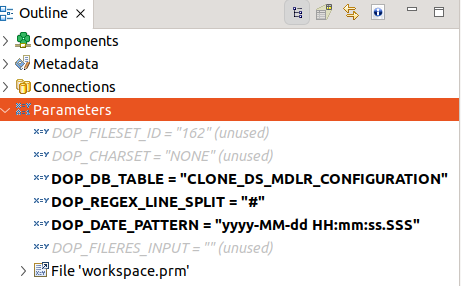
They will be proposed during the configuration of the contract (see below) and will be used in the graph engine.
In Output Contracts, the system_vBind_DS-push and system_newfile_DS-push system workflow templates must be used to execute Data Shaper graphs to connect and write to a database. So, let's design an Output Contract.
- In Data One, go to Design > Contracts.
- In the New Contract window, assign a Name and a Description to the Contract and select Output in the Contract Type drop-down list.
- Click Continue.
- In the Actor drop-down list, select the Actor of your Contract and click Continue.
- In the Actions section, fill in these fields:
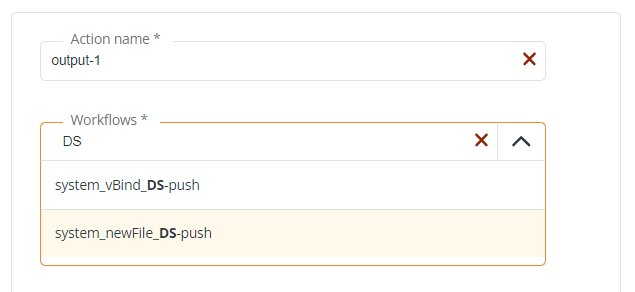
- Action name: you can leave Output-1.
- Workflows: since you are defining a Data Shaper Output contract, you must select a Data Shaper system template, either
system_vBind_DS-pushorsystem_newfile_DS-push. Note that entering DS in the Search edit box, the 2 Data Shaper system templates will be listed. In this example, we go for thesystem_newfile_DS-pushtemplate.
- Save your Contract.
- In the New Contract page, fill in these options:
- Cluster: select the cluster where Data Shaper will execute the graph. Selecting the Cluster will enable the Sandboxes list.
- DataShaper graph variables: select the Data Shaper Sandbox among those proposed in the Sandboxes dropdown list. Sandboxes are created, configured and listed in Monitoring > Data Shaper. Select the Data Shaper graph among those proposed in the Graphs valid for OUTPUT Contract dropdown list. The additional fields that appear are the same shown in the Prerequisites: fileset_ID, charset, table of the database, line split and date pattern. If needed, these options can be edited.

You can now add another Action or save your Contract.
As soon as the file arrives, its content will be copied in the clone_mdlr_configuration in the date pattern indicated, separated by #.
Results can be checked in the Jobs section and in the Data Shaper Server Console. Moreover, logs can be checked in the Logs > Data Shaper Engine module.
Updated over 1 year ago