Modeling Dataflows - NEW! 🚀
Modeling a dataflow means enriching it with specific information in a way that makes it more meaningful to business users.
Modeling features include:
- labeling of specific business flows so that they are recognized for a function
- management of the arrival of files
- processing of files on specific nodes through cut-offs
- definition of dataflow matching rules
The list of existing models appears going to Design > Dataflow Models.
🚀 The Dataflow Models page lists existing dataflow models, together with the indication of whether they are a Master or a Draft version, the number of matching criteria they have, dataflow and cut-off notifications.
If you are looking for specific dataflow models, use the Filters panel on the right to run a query with specific criteria. E.g., the name of the Model, the notification status (ON or OFF), the name of the node where the Model was created, the type of node (Data One, Spazio, FTP, SFTP, etc.), or a dataflow attribute.
By clicking the 3 dots icon on the right of the row, a menu will appear with options to enable or disable Dataflow/Cut-off notifications or view the model on the Dataflow Modeler page.

Note that the status of the Dataflow or Cut-off notifications can be enabled or disabled also when having multiple models selected. In this case, go to the Select drop-down list and choose the option you need.
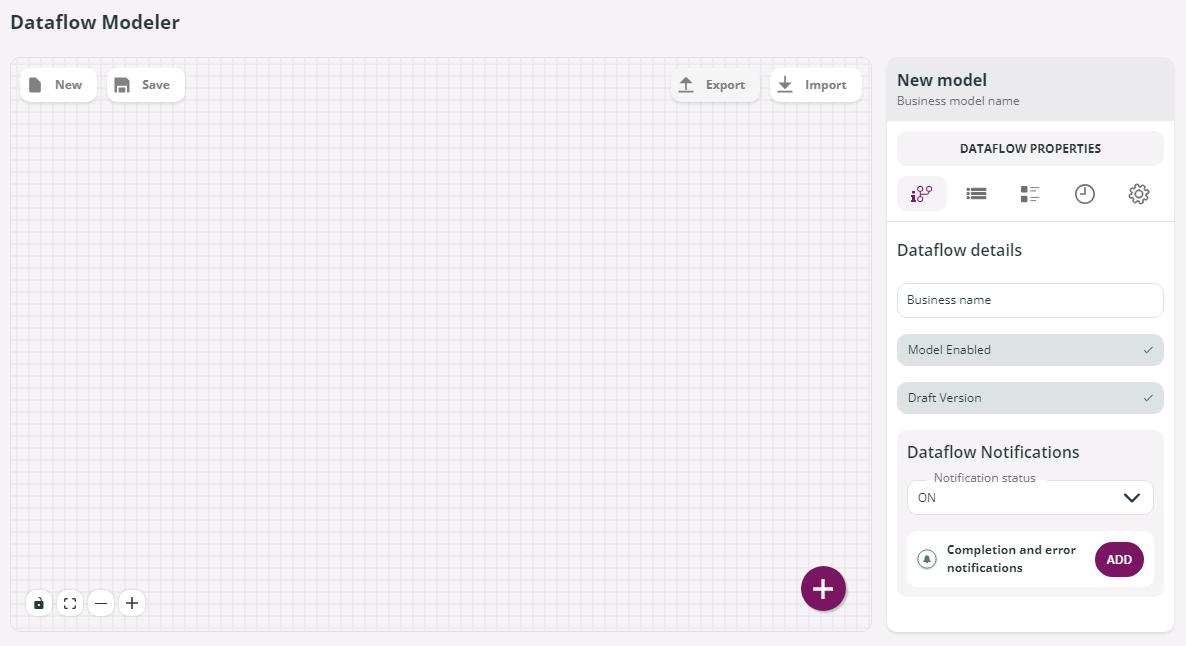
To create a new model in the Dataflow Models page, click the NEW button. The Dataflow Modeler will be displayed:
The Dataflow Modeler toolbar
At the top of the Dataflow Modeler board there is a toolbar with these options:
The New button
The New button is used to... open a portal to a parallel universe. No, we are kidding, the NEW button unsurprisingly creates a new Model from scratch.
The Save button
Never forget to save your Models! Click on the SAVE button and choose whether to save the Model as Draft or, once you have saved it at least once, promote it to Master. What are you waiting for? Save now!
The Reset button
You can restore the model to its last saved state. This is useful if you need to discard the most recent changes.
The Export button
To export a model, click the export button and it will be downloaded as .txt file on your local disk.
The Import button
To import a model, click the import button and browse your local drive to locate the model (it must be a .txt file) and upload it.

Details about the Dataflow Model lifecycle, how to create a data model from scratch, and how to retrieve existing flow models and restore a flow model are available on the following pages, together with Dataflow and Node Properties panels.
Dataflow Properties panel
The Dataflow Modeler board is equipped with a Dataflow Properties panel on the right.
This panel has 5 separate sections, which can be accessed clicking these icons: ![]()
![]()
![]()

![]()
Click the![]() icon to access the Dataflow details panel listing these options:
icon to access the Dataflow details panel listing these options:
- Business Name: the name assigned to the Model.
- Model Enabled: this option can be changed by clicking the Tools icon on the Toolbar.
- Draft Version: if checked, this model is a Draft Version. This option is read-only and cannot be updated.
- Dataflow Notifications: use this section to set alerts and their status. Click the ADD button next to Completion and error notifications to create a new alert. In the New notification window enter a name for the alert, select the event you want to be notified about (flow completed and/or flow in error) and choose the channel that will be used for the alert among those listed. For the System Email Notification Channel, at least a valid email address must be entered.
Click the![]() icon to access the Dataflow attributes panel. Dataflow attributes must be configured by Administrators – see Attributes for details.
icon to access the Dataflow attributes panel. Dataflow attributes must be configured by Administrators – see Attributes for details.
The asterisk * next to the attribute value means that the attribute is mandatory: at least one value must be specified or selected.
If the attribute is an Open type, you will be able to add new values when filling in this Dataflow Modeler section – refer to Attributes for details about Open and Close attributes. To add a new value, type the value in the edit box and select the Add option.
When selecting a value, the list of existing values will be shown.
Click the![]() icon to access the Matching criteria panel. If you want to know more about Matching Criteria follow this link. Learn how to set them here.
icon to access the Matching criteria panel. If you want to know more about Matching Criteria follow this link. Learn how to set them here.

Click theicon to access the Dataflow cut-off panel. You can learn more about cut-offs here.
Click the![]() icon to access the Dataflow Interface settings panel listing these options:
icon to access the Dataflow Interface settings panel listing these options:
- Resizable nodes: if checked, the node can be resized.
- Draggable nodes: if checked, you can drag the node.
Updated 2 months ago