Adding Virtual Paths
When created, VFS are empty so the very first thing you have to do is to add the Virtual Paths.
This is what you are required to do:
- Click the 3-dot icon and select Add child to add a folder to the VFS.
- In the Add Child window enter the name of the folder.
- Click the Save button and your folder will appear in the result list.

In the NAME field of the Add child and Add sibling windows, these characters are supported:These characters are not supported: " * / \ | : < > ? non-UTF8
- all alphabetic characters, both uppercase and lowercase (A-Z, a-z)
- numeric characters (0-9)
- these special characters: blank ' + - ; , = _ ( ) [ ] { } & $ £ @ # ^ ! . % ~
When creating a child folder, it will inherit the ACL properties of the parent folder and all permissions configured for the parent will be automatically applied to the children.
Go on creating new folders according to your needs. Always click the 3-dot icon and select the option according to your needs. Quite intuitively:
- Add child adds a sub-folder to the selected folder.
- Add sibling adds a folder at the same level as the selected one.
- Edit lets you select one of these editable options:
- Storage Class: select the storage class to associate with the virtual path.
- Retention Class: select the retention class to associate with the virtual path.
- Antivirus and DLP scan:
- AV enabled: choose whether to enable or disable AV scans. If the toggle is switched to On, you must choose an AV ICAP server to perform the scan.
- DLP enabled: choose whether to enable or disable DPL scans. If the toggle is switched to On, you must choose an DLP ICAP server to perform the scan.
- Recursive ICAP configuration: if the toggle is On, all new children will inherit the same ICAP configuration as the parent folder. Note that when you save the edited Virtual Path, a pop-up message will ask if you want to apply the changes to already existing child folders.
Once your VFS has the Virtual Paths associated, click each folder to open it and navigate its contents.

In the figure above, clicking > Design Phase, the view will be updated and the folders configured will be listed. When selecting the folders, the path will appear at the top of the panel.
This panel is particularly useful since it is provided with different options.
At the top, the breadcrumb trail is displayed and clicking the single folder name you can easily navigate and jump directly to the selected folder.
You can also search specific Virtual Paths by name. To do so, enter the name you are looking for in the Search field on the left. The search will be carried out in the folder selected and specified above the field. Note that the searched folder is specified in the edit box itself.
The items contained in each Virtual Path are listed below the panel, in a table view. Matched substrings are highlighted in bold in the result list. The number of results displayed out of the total number is shown on the left of the Search bar.
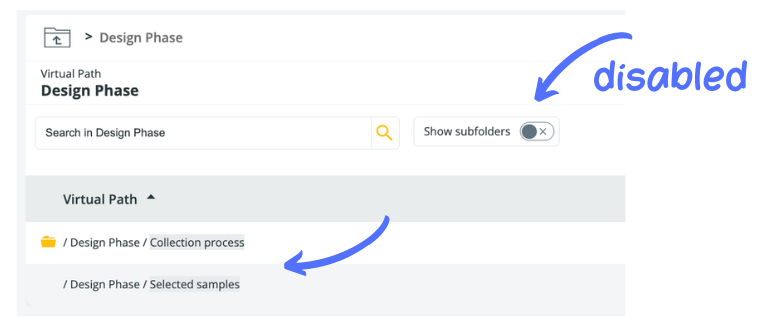
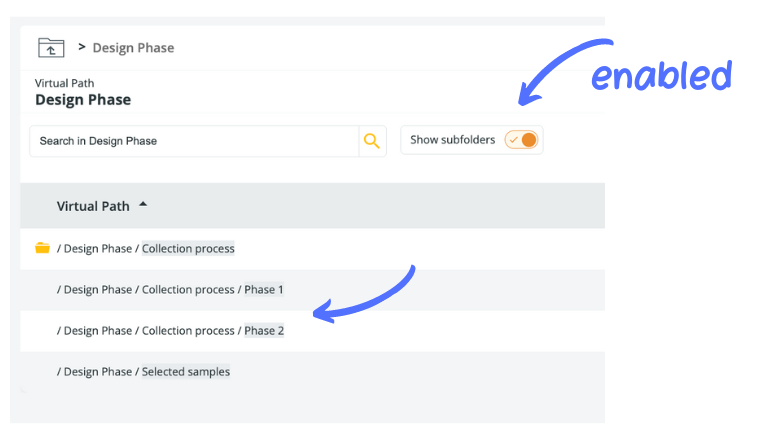
Selecting the Show subfolders toggle switch, you can list only the subfolders of the selected Virtual Path or all the subfolders existing in the Virtual File System.
In the following figures, you can see the folders of the same Virtual File System with the Show subfolders option disabled and enabled.
Updated 9 months ago