Primeur Online Docs
Data Mover 1.20
Data Mover 1.20
  • 🚀GETTING STARTED
    • What is Primeur Data Mover
    • Main features of Primeur Data Mover
    • Primeur Data Mover deployment
    • Navigate through Primeur Data Mover
  • 👥Actors
    • Who are the actors
    • Create your first actor
    • Configure an actor 🚀
      • Users Tab
      • Groups Tab
      • VFS Tab
      • File Resource Tab
      • Connection Contract Tab
      • Client Connections Tab
    • Search files by actor
    • Actor Lineage 🚀
      • Aggregation of flows by protocol 🚀
      • Lineage with connection contracts 🚀
      • Lineage with input, mediation and output contracts 🚀
      • Lineage with any contract type 🚀
  • 📝Contracts
    • What is a contract
    • Create your first contract
      • Create an Input Contract
        • Define the contract info
        • Associate the contract with the actor
        • Define the contract actions
        • Set the contract variables
      • Create a Mediation Contract
      • Create an Output Contract
      • Create a Connection Contract
        • Create a contract clause
        • Associate the VFS with file processing rules
        • File Processing Rules
    • Managing contracts 🚀
  • 🧱Workflows
    • What is a workflow
    • Create your first workflow template
    • Trigger types
      • Trigger types for input contracts
      • Trigger types for mediation and output contracts
    • Service tasks
      • Standard service tasks
      • Triggerable service tasks 🚀
      • Spazio selectors and filebox metadata management
      • Error management
    • Variables
      • Variables in workflows and contracts
      • Handling process variables
    • Workflow templates
      • System workflow templates
        • Workflow templates for input contracts
        • Workflow templates for mediation contracts
        • Workflow templates for output contracts
      • Custom workflow templates
        • Workflow template toolbar
        • Workflow template Shape repository panel
        • Workflow template working area
        • Workflow template BPMN-diagram panel
      • Error workflow templates
    • Editing workflow templates
    • DataFlow Instance Context (DFIC) 🚀
  • 🔓Security
    • Identity and Access Management
    • Users & Groups
      • Setting the password policy
      • Creating Internal Users 🚀
      • Creating Internal Groups
      • Creating External Users
      • Creating External Groups
    • Key Stores and Trust Stores
      • Key Store 🚀
        • Creating a Key 🚀
        • Creating a Certificate 🚀
        • Importing a Key or a Certificate
        • Creating a Symmetric key
        • Examples
      • Trust Store 🚀
        • Importing Keys 🚀
        • Importing Certificates
      • Untrusted Cache 🚀
      • Trusting an element
        • When do I use the Keys tab?
        • When do I use the Certificates tab?
      • PGP Key Store / PGP Trust Store
        • Configuring the PGP Key Store
        • Importing keys into the PGP Trust Store
  • 🛸TRANSPORT PROTOCOLS AND CONNECTORS
    • Data Mover client and server roles
    • Client Connections
      • Client Connection: FTP
      • Client Connection: FTPS
      • Client Connection: SFTP
      • Client Connection: HTTP
      • Client Connection: HTTPS
      • Client Connection: PESIT
      • Client Connection: SMB v3 or later versions
      • Client Connection: POP3 IMAP
      • Client Connection: SMTP
      • Client Connection: PR4/PR4S
      • Client Connection: PR5
      • Client Connection: PR5S
      • Client Connection: HDFS
      • Client Connection: HDFSS
      • Client Connection: Amazon S3 🚀
      • Client Connection: Google Cloud Storage
        • Credentials
      • Client Connection: Azure Blob Storage
      • Client Connection: IBM Sterling Connect:Direct
      • Appendix
    • Server Connections 🚀
      • Server Connection: FTP
      • Server Connection: FTPS
      • Server Connection: SFTP
      • Server Connection: HTTP
      • Server Connection: HTTPS
      • Server Connection: PeSIT
      • Server Connection: PR4
      • Server Connection: PR5
      • Server Connection: PR5S 🚀
      • Server Connection: IBM Sterling Connect:Direct
    • Stopping all servers in one go
  • 🛰️DMZ GATEWAYS
    • DMZ Gateways
    • DMZ Clusters
  • 🎧FILE EVENT LISTENER
    • What is the File Event Listener
    • Configuring File Event Listeners
      • Setting the File Event Listener Engine
      • Defining a contract for the File Event Listener
      • Setting events to be monitored
    • RegEx Rules 🚀
    • Monitoring File Event Listeners
  • 🔍ICAP
    • ICAP Engines
    • Configuring an ICAP Engine
    • Defining an ICAP rule
  • 📚CLUSTERING
    • STENG, Clusters and Servers
    • Adding a cluster and a STENG
    • Deleting a STENG
  • 🕒MONITORING
    • Jobs
      • Details about Jobs 🚀
      • jobman.sh CLI
    • Job Manager
    • Job Queues
      • Managing Job Queues
    • File Transfers
      • Ongoing
      • Finished
      • Reports
    • File Transfers Rules
      • Configuring Rules
  • 🤓ADMINISTRATION
    • Storage Classes 🚀
      • Storage Class: File System 🚀
      • Storage Class: SMB v3 or later versions 🚀
      • Storage Class: Amazon S3 🚀
      • Storage Class: Google Cloud Storage 🚀
      • Storage Class: Azure Blob Storage 🚀
    • Retention Classes
    • Virtual File Systems (VFS) 🚀
      • Creating a VFS 🚀
      • Configuring a VFS
      • Adding Virtual Paths
      • Modifying and Deleting a VFS
      • Searching files in all VFS
    • File Resources
      • Creating File Resources
      • Navigating File Resources
      • How to use File Resources
    • Advanced Settings
  • 👑FILE MANAGER
    • Getting started
    • Logging into File Manager
    • Managing the File Manager 🚀
      • The list of results
      • Creating new folders
      • Uploading files
      • Downloading files 🚀
      • Searching for files and folders
      • Deleting files 🚀
      • Bulk actions 🚀
    • File Manager and VFS
    • Customizing File Manager externals
      • The configuration-wui.json file 🚀
      • How to customize the Login window and the logo
      • How to customize the footer
      • How to configure the Upload with Metadata option
      • How to customize bulk actions 🚀
  • 🧑‍⚖️FILE ROUTING
    • What is File Routing 🚀
    • Routing Rules page
      • The Rules tab
      • The Categories tab
      • The Output tab
    • How to create a rule 🚀
      • Add metadata 🚀
      • Select ACTIONS
      • Select OUTPUTS
      • Policy for the selection of metadata rules
    • Configuration of the environment in Data One
      • Set up Storage Classes
      • Set up Retention Classes
      • Configure the Actor
      • Set up File Resources
    • Associate the Routing Rule with a Contract
    • Example
  • 💬LOGS & AUDIT
    • Logs 🚀
      • Logs options 🚀
      • Troubleshooting error analysis in Logs
    • Audit Options 🚀
      • Export audit logs 🚀
      • List of Audit entity types 🚀
      • Audit message codes 🚀
    • Log Notifiers 🚀
      • FEL message codes
  • 📩NOTIFICATION CHANNELS
    • What are Notification Channels
    • Configuring the default Email Notification Channel
    • Configuring a new Email Notification Channel
    • Trusting Certificates
    • Managing Templates
      • Data Watcher Macros
      • Contract Macros
      • ICAP Macros
      • Central Log Macros
      • Email Templates
      • Editing default templates
      • Loading a new template
  • 🟣DATA MOVER + DATA WATCHER
    • Data Mover in a bundle with Data Watcher
    • Attributes 🚀
    • Cut-off Board
      • Cut-off Calendars
    • Dataflow Inquiry
  • 🟠DATA MOVER + DATA SHAPER
    • Data Mover in a bundle with Data Shaper
    • Monitoring
    • Execution History
    • Sandboxes
  • 💻API
    • HTTP MFT Rest API
    • Job Manager APIs 🚀
    • SFTP Server sessions APIs 🚀
    • Audit Logs APIs 🚀
  • 🧐HOW TO...
    • ... use different DNS names - NEW! 🚀
    • ... configure a Cron Expression
    • ... configure an Application
    • ... customize a header
    • ... run searches in Data Watcher 🚀
    • ... use Data Shaper graphs in Data Mover contracts
    • ... modify DMCFG and deploy it
    • ... tune Data One data retention
  • 🗒️RELEASE NOTES
    • Data One 1.20.10
    • Data One 1.20.9
    • Data One 1.20.8
    • Data One 1.20.7
      • Data One 1.20.7.1
    • Data One 1.20.6
    • Data One 1.20.5
    • Data One 1.20.4
    • Data One 1.20.3
    • Data One 1.20.2
    • Data One 1.20.1
    • Data One 1.20.0
Powered by GitBook
On this page
  1. ICAP

Configuring an ICAP Engine

PreviousICAP EnginesNextDefining an ICAP rule

Last updated 9 days ago

These configuration settings are fully exploited when an ICAP Engine definition is referred from a Virtual Path, i.e. when implicit scan is used - see also and . When an ICAP Engine is referred from an ICAP Service Task (see also ), only the Connection parameters must be used.

Here is how to configure an ICAP Engine.

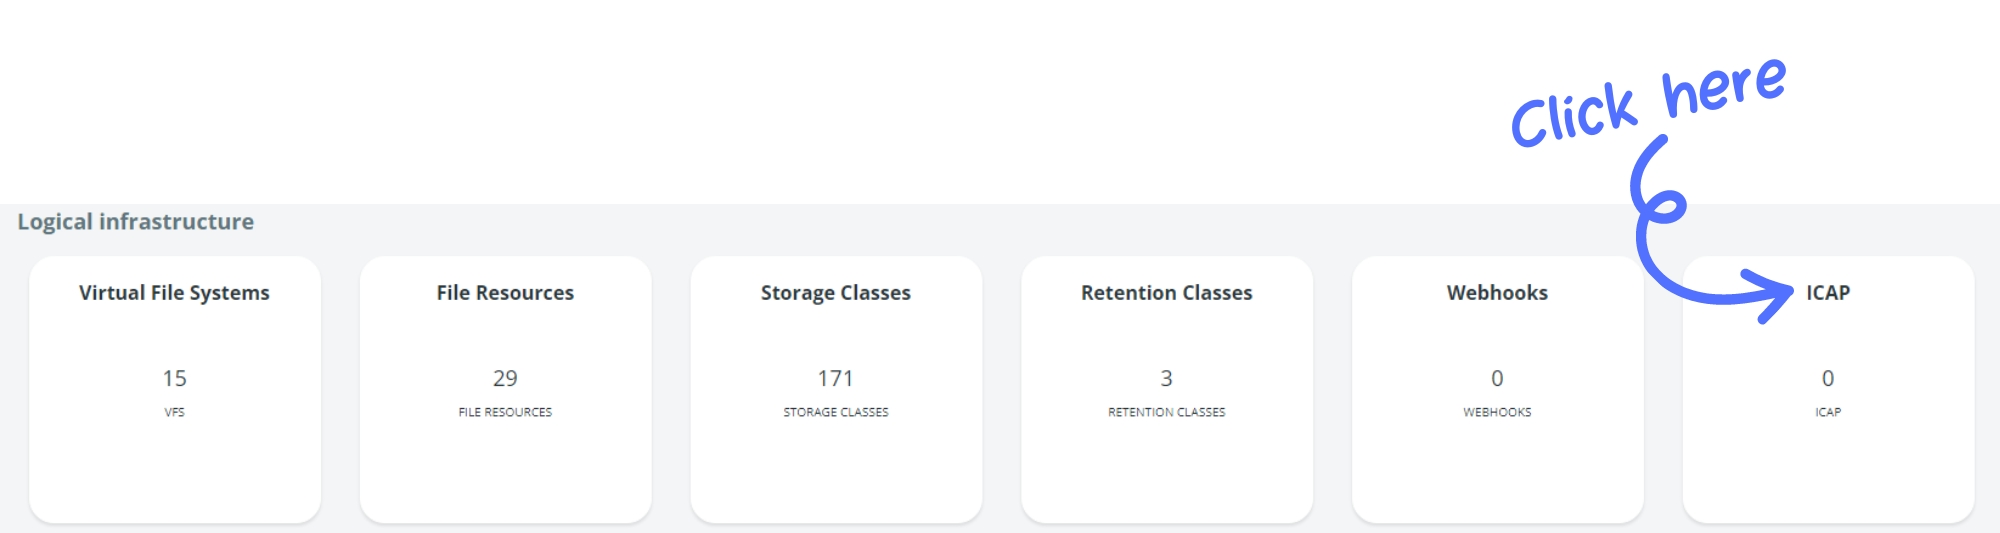
First you will need to enter the Setup → ICAP Engines section of Data Mover.

Then click on the New button. This will open the ICAP Engines page.

There you will need to insert and select the parameters that Data Mover needs to connect to the ICAP server. Here they are (remember that all parameters with an * are mandatory):

Parameter
Description

Name *

Name of the ICAP connection you are creating.

Description

Description of the ICAP connection you are creating. The maximum number of characters is 2048.

CONNECTION

Host *

Remote ICAP host IP Address or hostname. The maximum number of characters is 255.

Port *

Port to connect to the remote host (1 to 65535). Default value: 1344.

HTTP Method *

The HTTP method used to interact with the ICAP Server. Possible values are:

  • GET (default value)

  • POST

  • PUT

ICAP Method *

The ICAP method used to interact with the ICAP Server. Possible values:

  • RESPMOD (default value)

  • REQMOD

AV service *

Name of the AV service. At least one of the two services AV service or DLP service needs to be configured; an ICAP engine can provide only one or both services. The maximum number of characters is 255.

DLP service *

Name of the DLP service. At least one of the two services AV service or DLP service needs to be configured; an ICAP engine can provide only one or both services. The maximum number of characters is 255.

Basic authentication

Option to activate basic authentication when you connect to an ICAP server. Possible values:

  • Enabled

  • Disabled (default value)

Username

This field is editable only when the Basic authentication option is enabled. Username for the Basic authentication.

Password

This field is editable only when the Basic authentication option is enabled. Password for the Basic authentication.

Preview size

The size in bytes of the preview sent to the ICAP server. Default value: 1024.

Max file size

The maximum size in megabytes of the file sent to the ICAP service. If the actual file size is larger than the maximum file size, the file will not be sent to the ICAP server for scanning.

SSL

Option to activate an SSL authentication protocol. Possible values:

  • Enabled

  • Disabled (default value)

Match server hostname

Possible values:

  • Enabled

  • Disabled (default value) When set to Enabled, the Client verifies that the Distinguished Name (DN) certificate contains the IP that has been contacted (i.e., the HOST value above).

Server key label

Key identifier to create the SSL connection

Authentication protocol

Select the SSL authentication protocol:

  • ALL

  • ONLY SPECIFIC VALUES

Accepted cipher suites

  • ALL

  • ONLY SPECIFIC VALUES

Connection timeout

Number of seconds without network activity to wait before closing a session due to inactivity. Default value: 10.

Response timeout

Number of seconds without a response from the server to wait before closing a session due to no response from the server. Default value: 120.

Max retries

Maximum number of retries. If this field is empty or set to 0, no retries will be executed and the job will be set to Failed if the first attempt is not successful. A high value corresponds to a high number of retrying attempts.

Retry interval

Time (in seconds) waited before retrying executing a job. The lower the value, the more frequent the retrying attempts. If this field is empty or set to 0, no retries will be executed and the job will be set to Failed if the first attempt is not successful.

FILE ACTIONS

Server unavailable

Define whether to allow or delete a file if the ICAP server is unavailable and the scan cannot be performed. Possible values:

  • Allow (default value)

  • Delete Click the ADD button in the Notification box to send a notification when a file cannot be scanned because the server is unavailable. In the New Notification pop-up define a Name for the notification and select the Notification Channel you want to use.

AV threat detected

When an AV threat is detected on a scanned file, the file is automatically deleted. Click the ADD button in the Notification box to send a notification when a file is deleted because an AV threat has been detected. In the New Notification pop-up define a Name for the notification and select the Notification Channel you want to use.

DLP breach detected

When a DLP breach is detected on a scanned file, the file is automatically deleted. Click the ADD button in the Notification box to send a notification when a file is deleted because a DLP threat has been detected. In the New Notification pop-up define a Name for the notification and select the Notification Channel you want to use.

File scan skipped

Define whether to allow or delete a file if the scan has been skipped due to the file size exceeding the max size set above. Possible values:

  • Allow (default value)

  • Delete Click the ADD button in the Notification box to send a notification when a file scan has been skipped. In the New Notification pop-up define a Name for the notification and select the Notification Channel you want to use.

Once you have set all the necessary parameters, click Save.

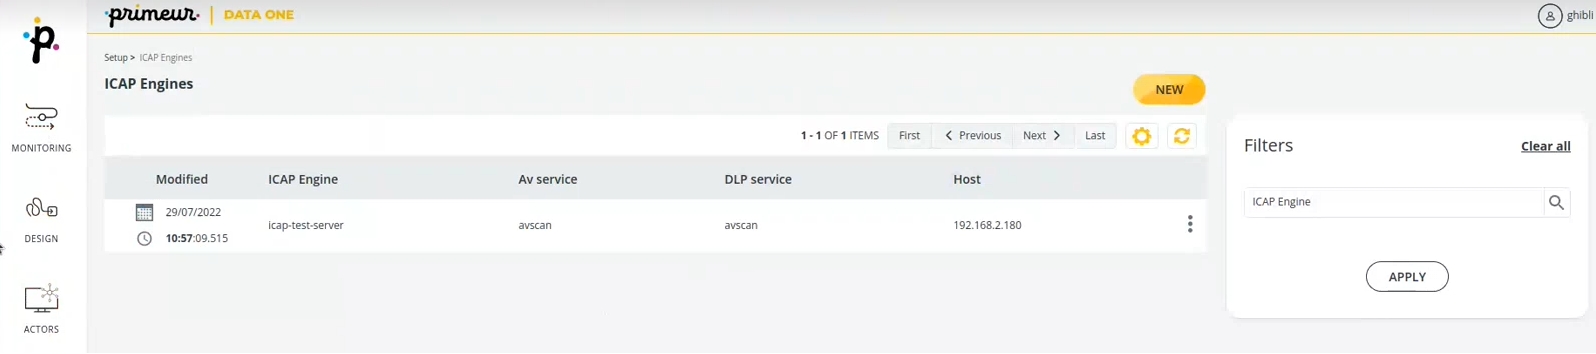
You will see the configuration in the result list.

In the result list, there are columns for:

  • The last time a Server has been modified

  • The name of the ICAP Engine

  • The name of the AV service associated with the ICAP Engine

  • The name of the DLP service associated with the ICAP Engine

  • The host name

Select the cipher suites SSH. ALL or specific values in the drop-down list (See ):

The 3-dots icon at the end of each entry lets the user Edit and Delete the ICAP Engine. Learn how to use the toolbar at the top of the page . Results can be sorted in the Filters panel on the right of the page. Insert the ICAP Engine name and click on the APPLY button to filter results.

The next step to configure an ICAP connection is to create a Mediation Contract. Follow this to learn more about contracts and how to create them.

🔍
link
ICAP Engines
Adding Virtual Paths
here
Accepted Chiper Suites
Configuring Triggerable Service Tasks - ICAP