Data Synchronization
Synchronization in Primeur Panorama is the process of keeping data consistent with Data Watcher. This involves updating and aligning data to reflect the latest changes, additions, or deletions to ensure that all participating systems have the same data.
In Panorama, synchronization is performed incrementally, which means only the changes made since the last synchronization are updated. This includes new data, modifications, and deletions, making the process more efficient and faster than full data synchronization. The platform tracks unsynchronized events to ensure no updates are missed, maintaining data consistency.
Note
If Data Watcher updates with data from days already synchronized, Panorama will not automatically accept it and you will have to force synchronization.
The interface has 3 separate tabs: Calendar, Scheduling, and History.

Calendar tab
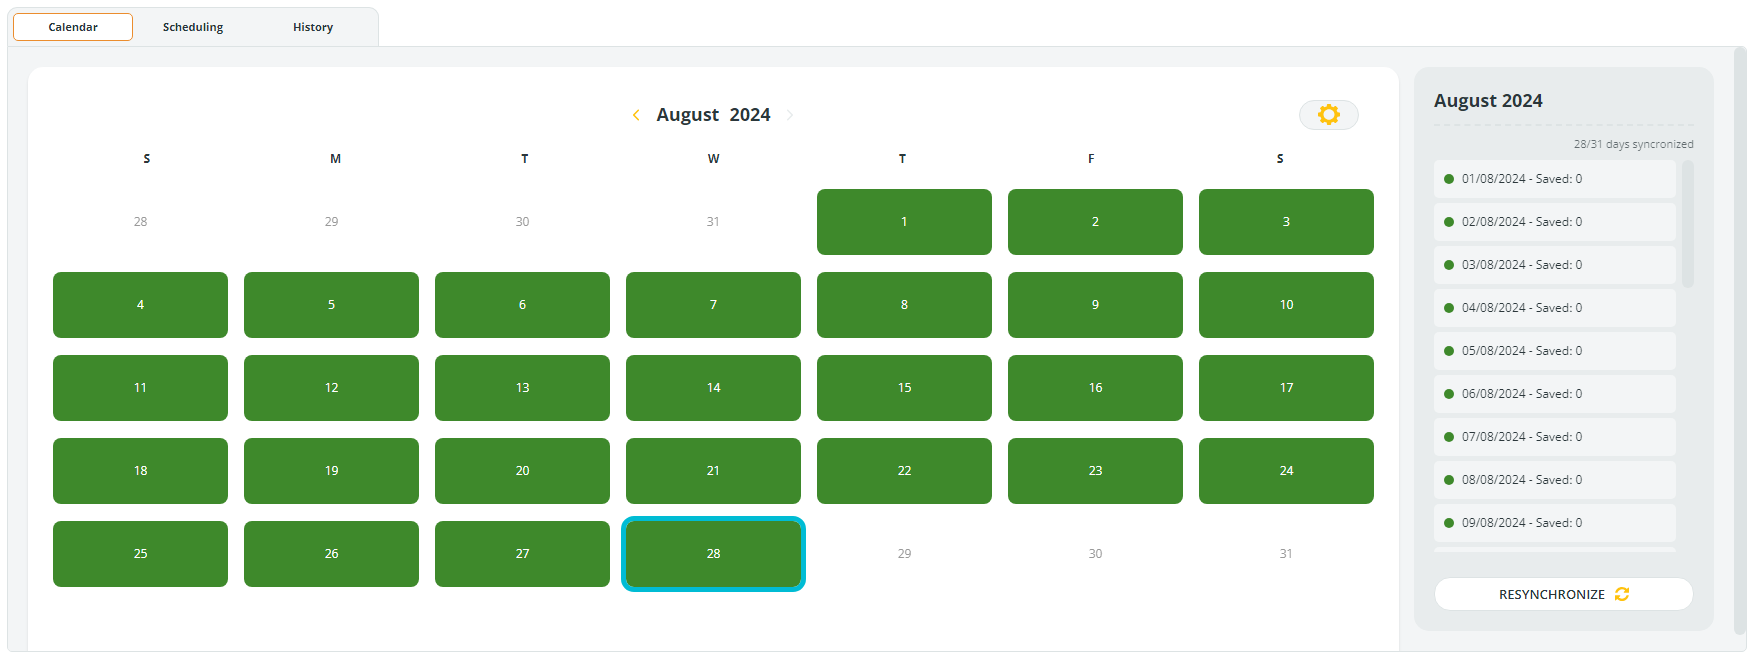
The main area of the interface displays a calendar for the current month. Each day is displayed as a box. A green box indicates successful synchronization with Data Watcher on that date, while a gray box indicates no synchronization with Data Watcher.
The current date is highlighted with a blue outline, helping you to quickly identify today’s date.
You can navigate between months by clicking the < and > arrows at the top of the calendar.
On the right side of the window, a panel lists each day of the current month where synchronization has occurred.
Each entry includes the date (e.g., 01/08/2024) and a brief note (e.g., "Saved: 0") indicating the events downloaded for each individual day of the month by Data Watcher.
A green dot next to each entry confirms that synchronization was successful on that day.
The top of this panel displays the total number of days synchronized out of the days in the month (e.g., "28/31 days synchronized").
If you need to initiate a new synchronization, use the Resynchronize button at the bottom of the panel. In this case, the entire month shown will be synchronized, up to the current date.
To synchronize a single gray day, click the day and then the SYNC NOW button.
To resynchronize a single green day, click the day and then the Resynchronize button. This may be needed if there are new events for that specific day that have not been synchronized.
To synchronize a specific time interval, click the  Custom Sync button, and select the starting and ending date of the synchronization. This is useful if you need to synchronize multiple days but not the entire month.
Scheduling tab

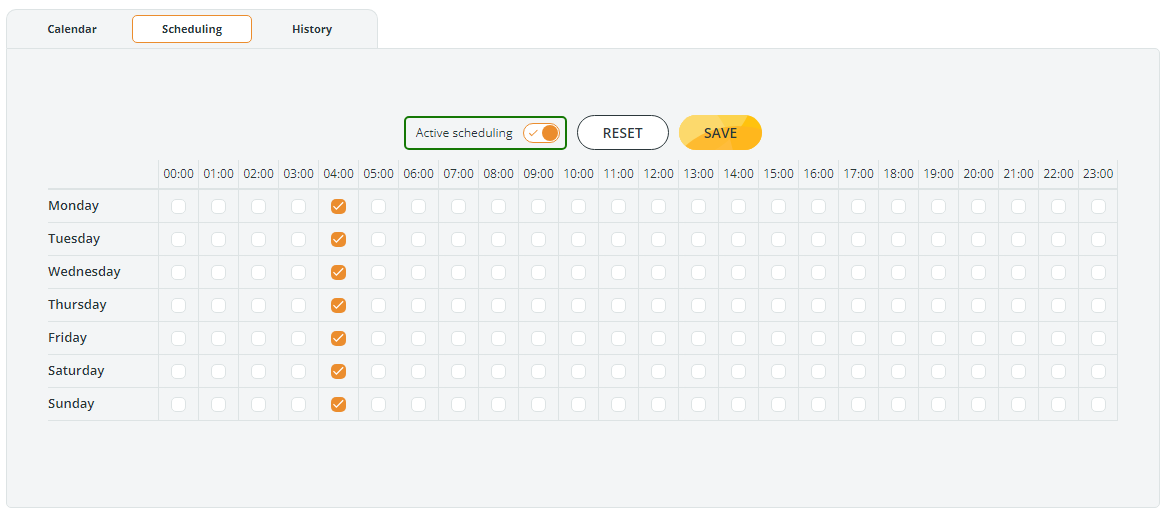
In this section, Administrators can select the days and times they want synchronization to occur. Synchronization is particularly useful to maximize efficiency and productivity and to optimize your time and resources, avoiding unnecessary delays.
Each cell in the grid represents a 60-minute time slot for a specific day. Click on the cell to select or deselect it.
A toggle switch allows you to make the scheduling active or inactive. When made inactive, the synchronization will not be started, but the configuration will be saved.
Click the SAVE button to save the schedule and apply the settings.
The RESET button clears the entire table. If you want to keep the saved options without clearing the entire table, you can select the Active scheduling toggle switch and set it to Inactive scheduling. This is useful because it keeps the configuration set but inactive, instead of clearing everything.
History tab

The History tab lists all synchronizations that have occurred up to the current time.
A paged, navigable table lists synchronizations from the most recent to the oldest. Two buttons in the navigation bar allow you to configure the number of entries displayed (10, 20, or 50) and to refresh the list.
The columns in this table show:
- Status: If the synchronization was successful, it displays Completed. Otherwise, it displays error, stopped, or stopping.
- Period: This column shows the days that have been synchronized, with the start and end date and time.
- Started and Ended: These columns show the start and end times of the synchronization activity.
- Saved days: Indicates how many days have been saved in the sync.
- Saved Events: Indicates how many events have been saved in the sync.
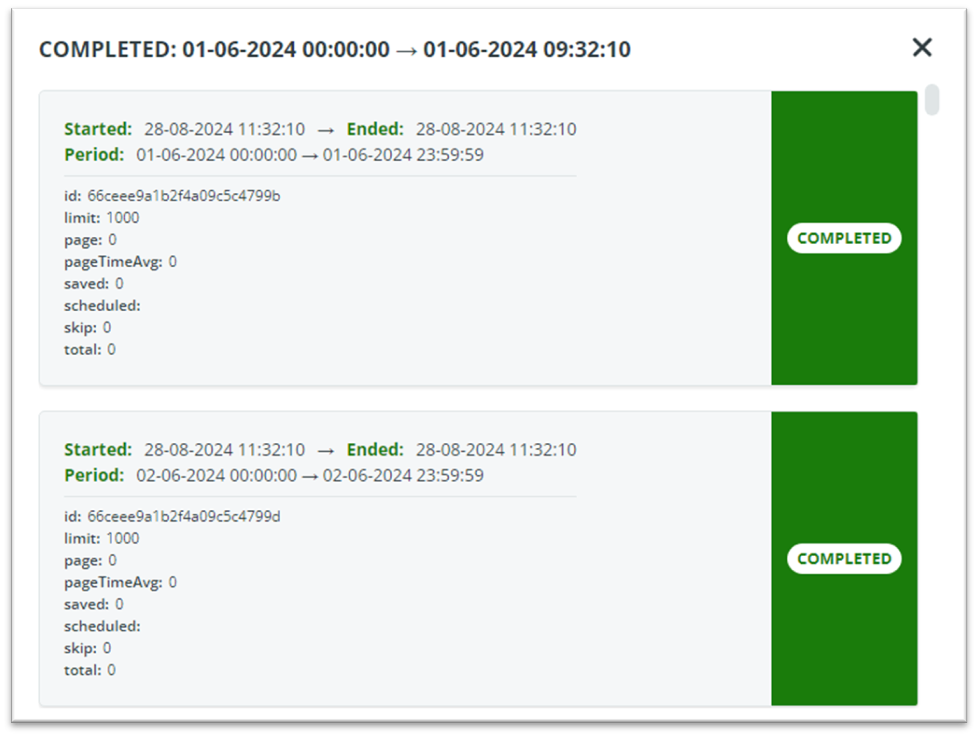
Clicking a single line, a stand-alone window will appear with the details of the selected synchronization.

Updated about 2 months ago
