Filtering the records
In this chapter we will learn how to filter records with the Filter component.
This chapter builds on the graph from the Creating a Transformation Graph.
Inserting the Filter
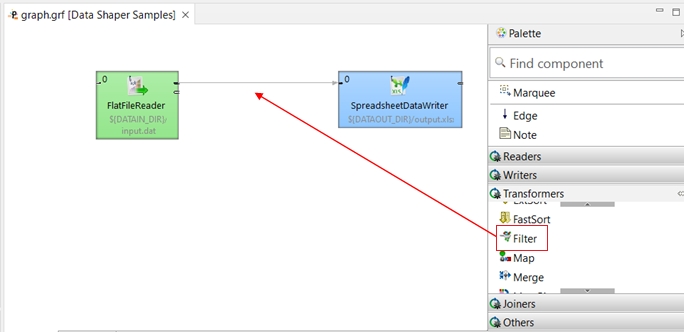
The component for filtering is called Filter. You can find it in the Transformers category. Drag the component on the edge between FlatFileReader and SpredsheetWriter.
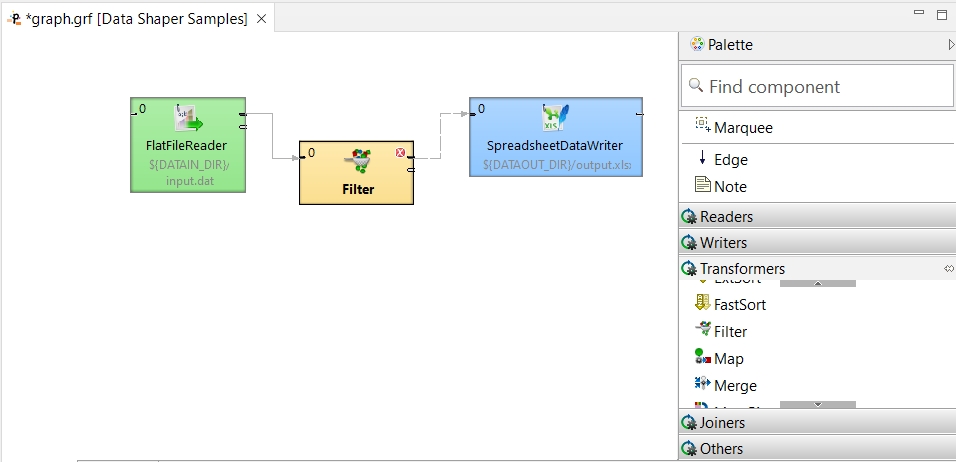
The filtering condition is not specified yet, therefore can you see an error on the component.
Setting Up the Filter Component
To set the Filter Component, follow these steps:
Double-click the Filter component to open the component editor.
Click the Filter expression row in the component editor and then the 3-point button on the right.
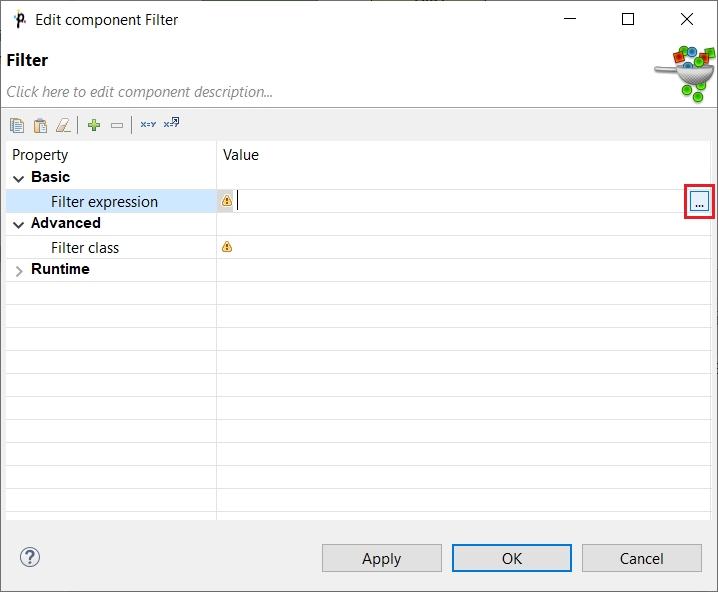
The Filter Editor will open:
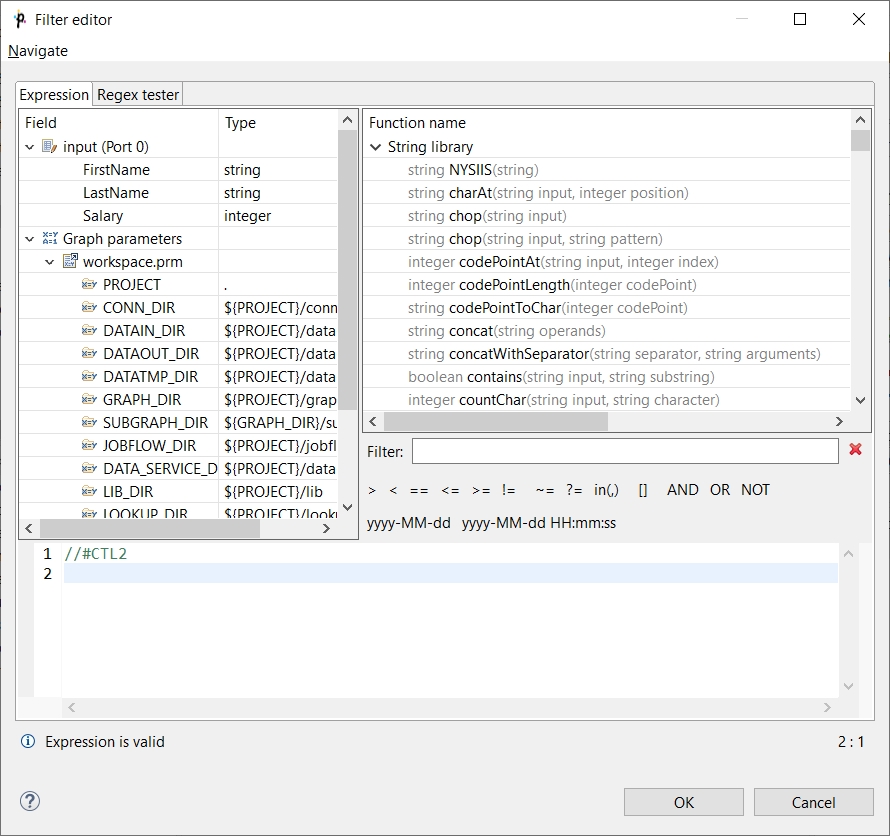
Select the
salaryitem and double-click it. The$in.0.salaryexpression will appear on the blue background in the pane at the bottom.
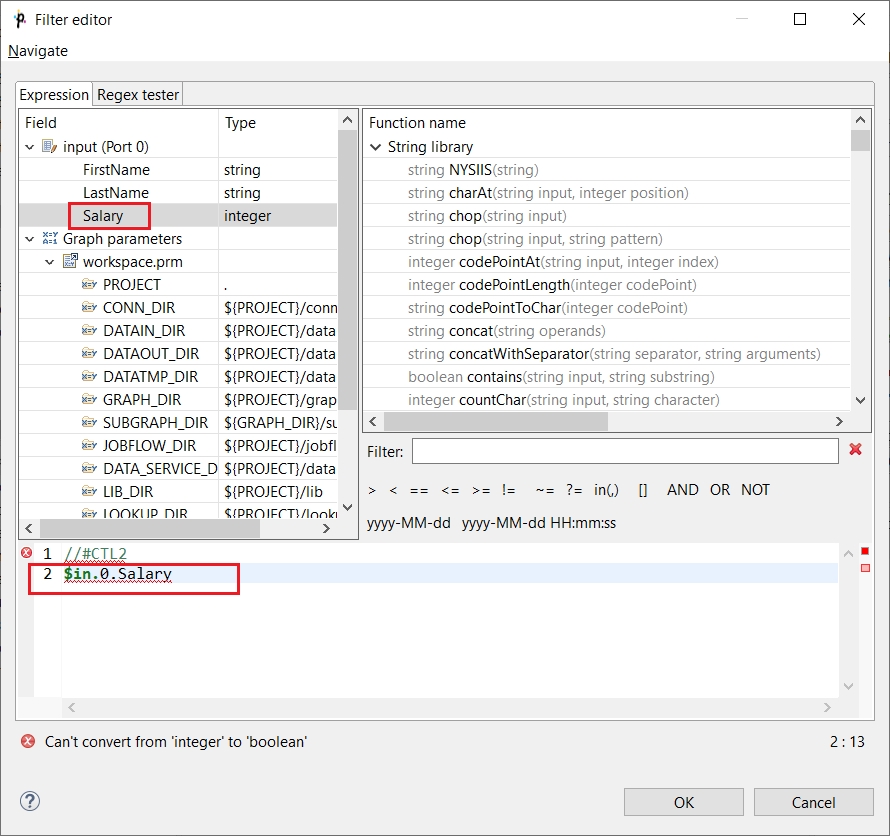
Note that Data Shaper validates the expressions automatically. Now an error will be found.
Click the > (greater than) option. It will appear on the right side from
$in.0.salary.
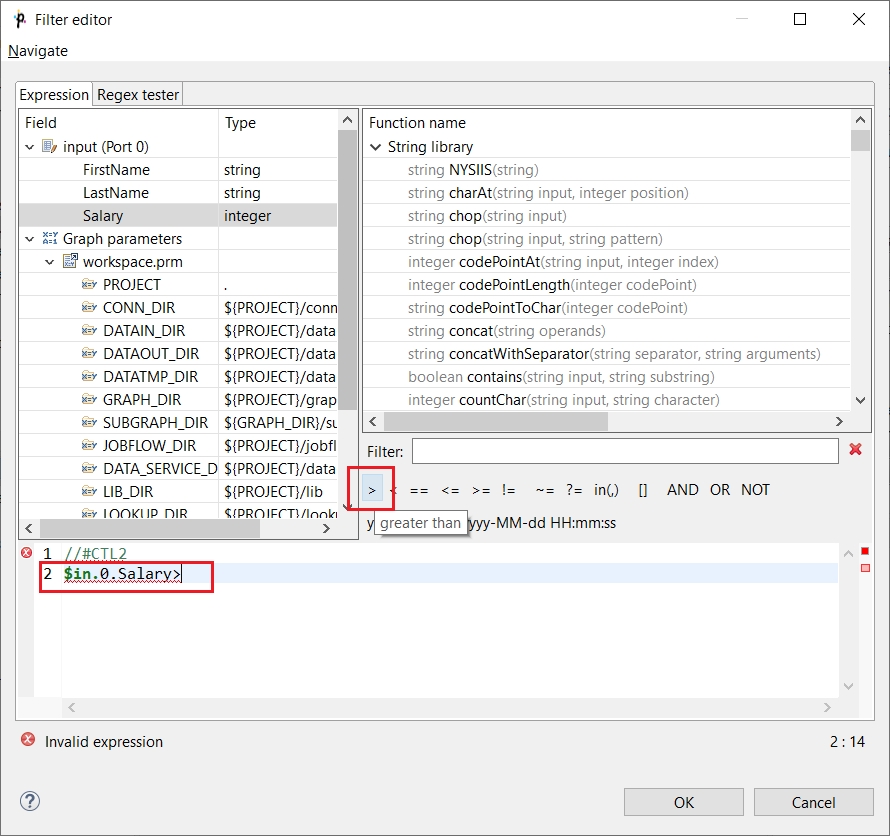
Complete the expression to make it valid adding
24000.
24,000 is the salary that will be used to filter incoming data flow. Only data records with salary higher than 24,000 will be sent out.
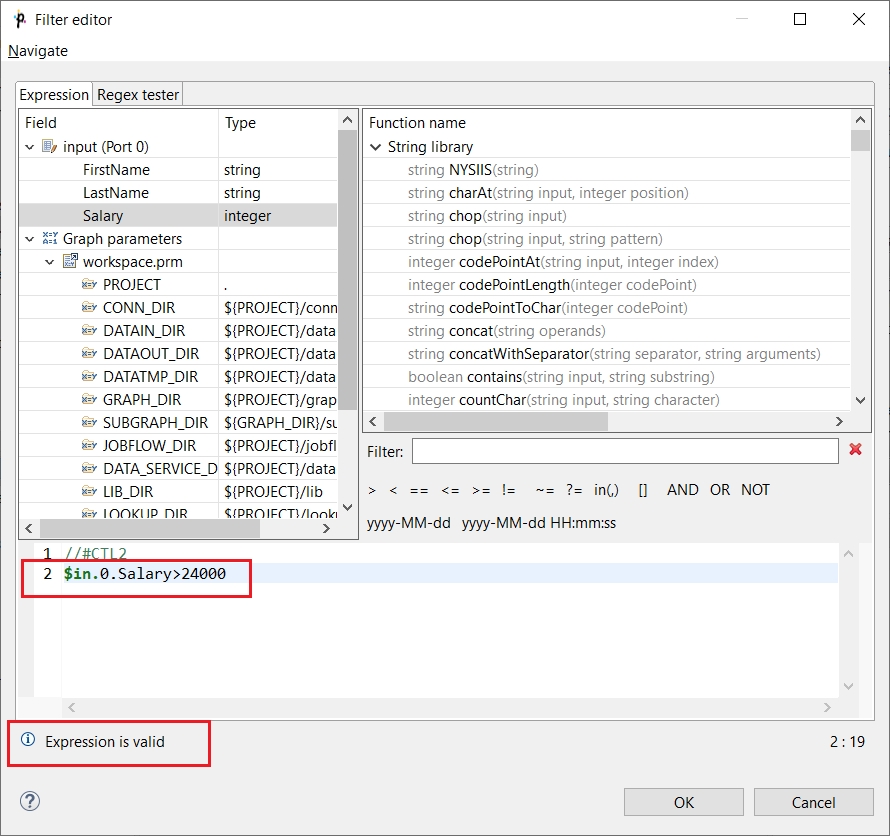
ClickOK to close the FilterExpression editor.
The filtering condition is now specified and the error on the Filter component is no longer shown>
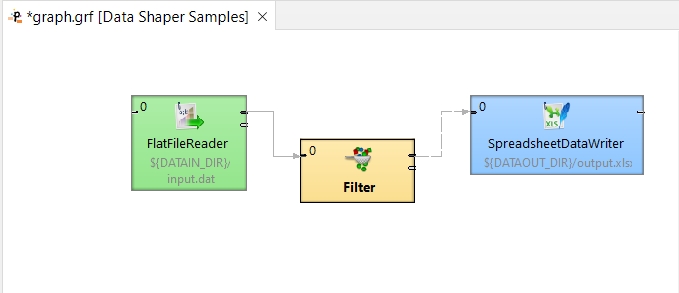
The Filter is configured and you can run the graph.
See also the documentation of the Filter Transformer.
Two data streams
You can use the Filter component to split data stream into two data streams. Connect an edge to the second output port of the filter to get rejected records too.
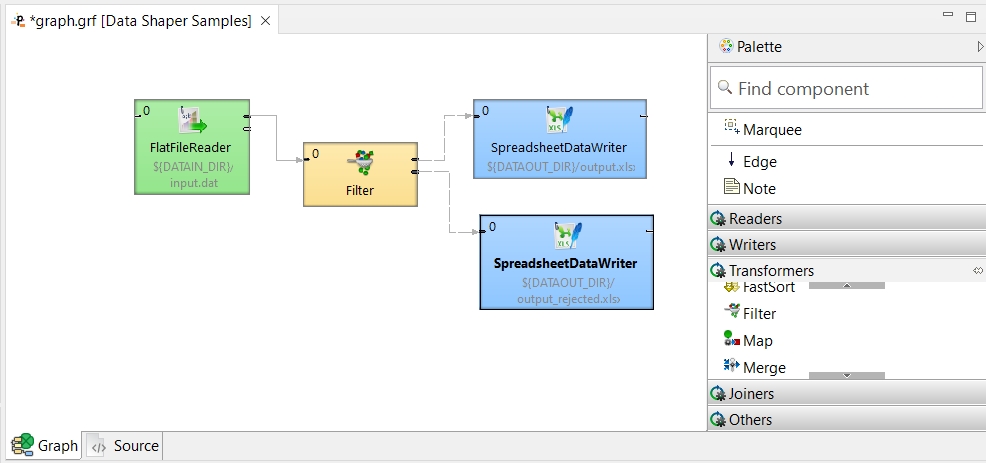
You can use the same condition as in the previous example. The records matching the data filter condition will be passed to the first output port, the later ones will go to the second output port.
Last updated