# Data One
The configuration of the **Data One plugin** is required to:
* establish the connection between Panorama and Data One
* display the **Data One Card** in the Dashboard
* access and explore the **Data One infrastructure** in the corresponding analytical panel
Follow the steps below to configure the plugin:
1. Go to **Setup** → **Plugins**.
2. Click the **+** button. The **Add New Plugin** window opens.
3. Select the **DATAONE** card.
4. Fill in the required fields as described below.
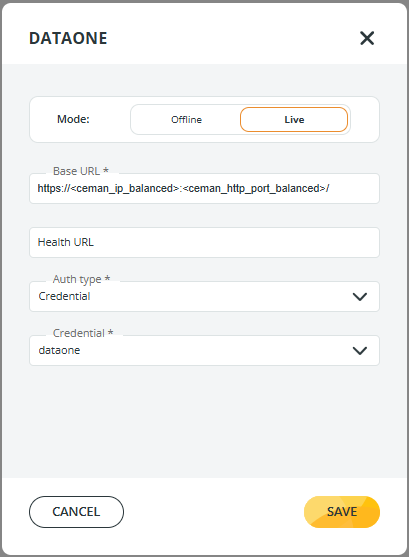
* **Mode**: choose how Panorama retrieves the Data One infrastructure:
* **Offline**\
Enables Panorama to download the Data One network infrastructure once.\
This avoids repeated downloads each time the Data One page is accessed.
* **Live**\
Downloads the Data One infrastructure **every time** the Data One page is accessed.\
Panorama then combines this infrastructure with transfer data retrieved from **Data Watcher**.
* **Base URL (\*)**: enter the URL (host and port) of the balanced CEMAN: \
`https://:/`
* **Health URL** (optional): enter an endpoint for health checks when the Base URL cannot be used to verify the status of Data One. E.g., `/ghibli-next`.
* **Auth Type (\*)** **and Credential (\*)**: select the authentication method (**Auth type**), and the credential set (**Credential**) to be used when connecting to the Data One instance defined in **Base URL**.
Once all required fields are completed:
* Click **SAVE** to store the configuration.
* Panorama will start interacting with the Data One instance according to the selected mode.