# Create an Input Contract
**Input Contracts** define how Data Mover connects with an actor to retrieve files.
The creation of the **Input Contract** consists of these steps:
1. **Define the contract info**. This step defines the details of the contract, its name, type, and how it must be processed.
2. **Associate the contract with the actor**. This step defines the details of the actor that Data Mover needs to access to collect or send the files.
3. **Define the contract actions**. This step defines the trigger that will fire the contract and the workflow associated with the contract.
4. **Set the contract variables**. This step defines the interaction between the contract and the workflow, setting the variables that will be initialized.
## Define the contract info
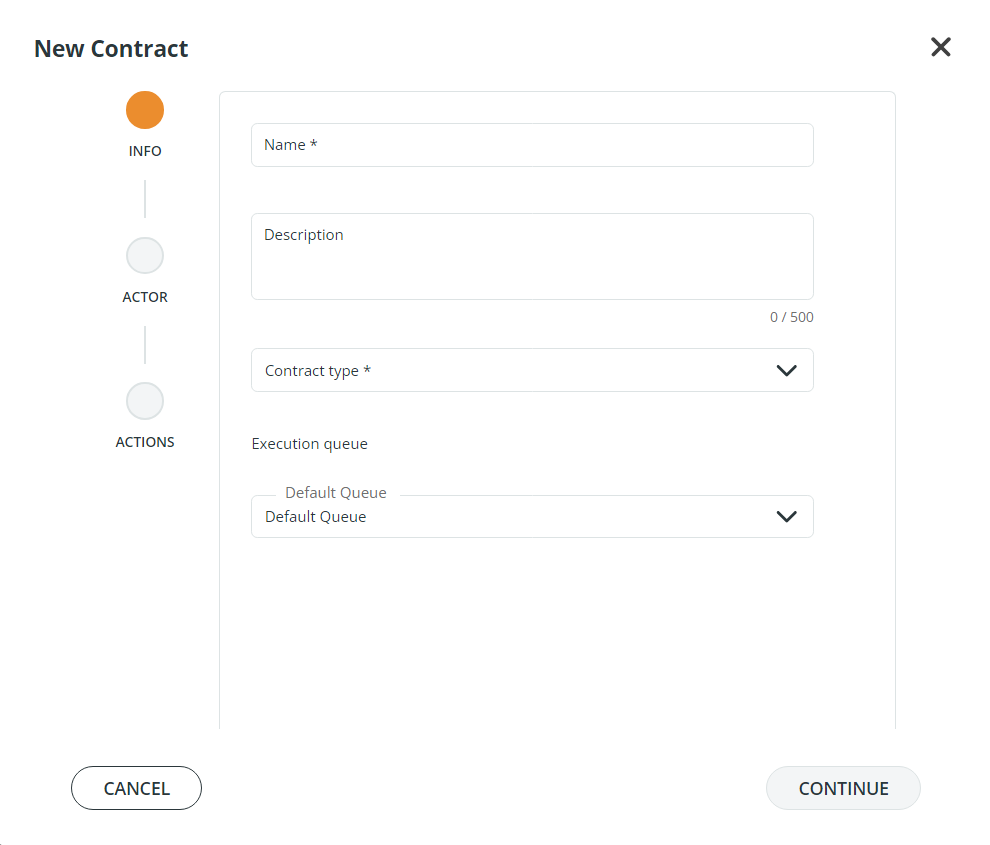
To create a new Contract, go to **Design** → **Contracts** and click the **New** button to open the **New Contract** window.
As you can see on the left of the window, the wizard guides you through 3 subsequent steps:
* INFO
* ACTOR
* ACTIONS
To create an **Input Contract**, complete the fields in the **INFO** section as follows:
* **Name**: assign an identification name to the contract. It is suggested to assign a name that can be easily identified at any time.
* **Description**: enter a description of the contract you are creating.
* **Contract Type**: in the drop-down list, select **Input**.
* **Execution Queue**: by default, a contract is associated with a default queue. Queues order the tasks designed in the contract and define how they must be processed. To assign a contract to a different queue, open the drop-down menu and select another queue among those available. Details about queues can be found in the [Job Queues](/data-mover-1.21/monitoring/job-queues.md) section of this documentation.
After you have filled in all the fields, click the **CONTINUE** button.
## Associate the contract with the actor
This step defines the details of the actor that Data Mover needs to access to collect or send the files.
In the **ACTORS** section of the wizard, select the actor your contract will be associated with, choosing between **Partner** or **Application** in the drop-down list.
A **Search** field is available to look for specific names. The list will be filtered as soon as you start typing an alpha-numeric character, and all actors containing that character will be listed.
Now that an actor is selected, click the **CONTINUE** button.
## Define the contract actions
In this step, you will define the trigger that will fire the contract and the workflow, i.e., the sequence of tasks that will be executed in the contract.
Enter the **Action Name**. If you are satisfied with the system-generated name, you can leave it as it is. If you are not, enter a different name.
Select the **Trigger** that will start the contract. Possible options are:
* **On demand**: this trigger is started by a direct API invocation via REST, specifically the Job Manager Submit API. See [On Demand trigger](/data-mover-1.21/workflow-templates/triggers/ondemand.md).
* **On Message**: this trigger needs a specific license.
* **Time**: this trigger requires time-based actions to be performed at specific times. See [Time Trigger](/data-mover-1.21/workflow-templates/triggers/time.md).
Select the **Workflow** from the drop-down menu. A brief description of the workflow template and its visual representation will appear in the lower section of the window. For more information about workflows, refer to the [Workflow templates](/data-mover-1.21/workflow-templates/what-is-a-workflow-template.md) section.
Once all the fields have been selected, click on the **SAVE** button. The wizard will be closed, and you will be directed to the **New Contract** page to configure the actions of the contract.
## Set the contract variables
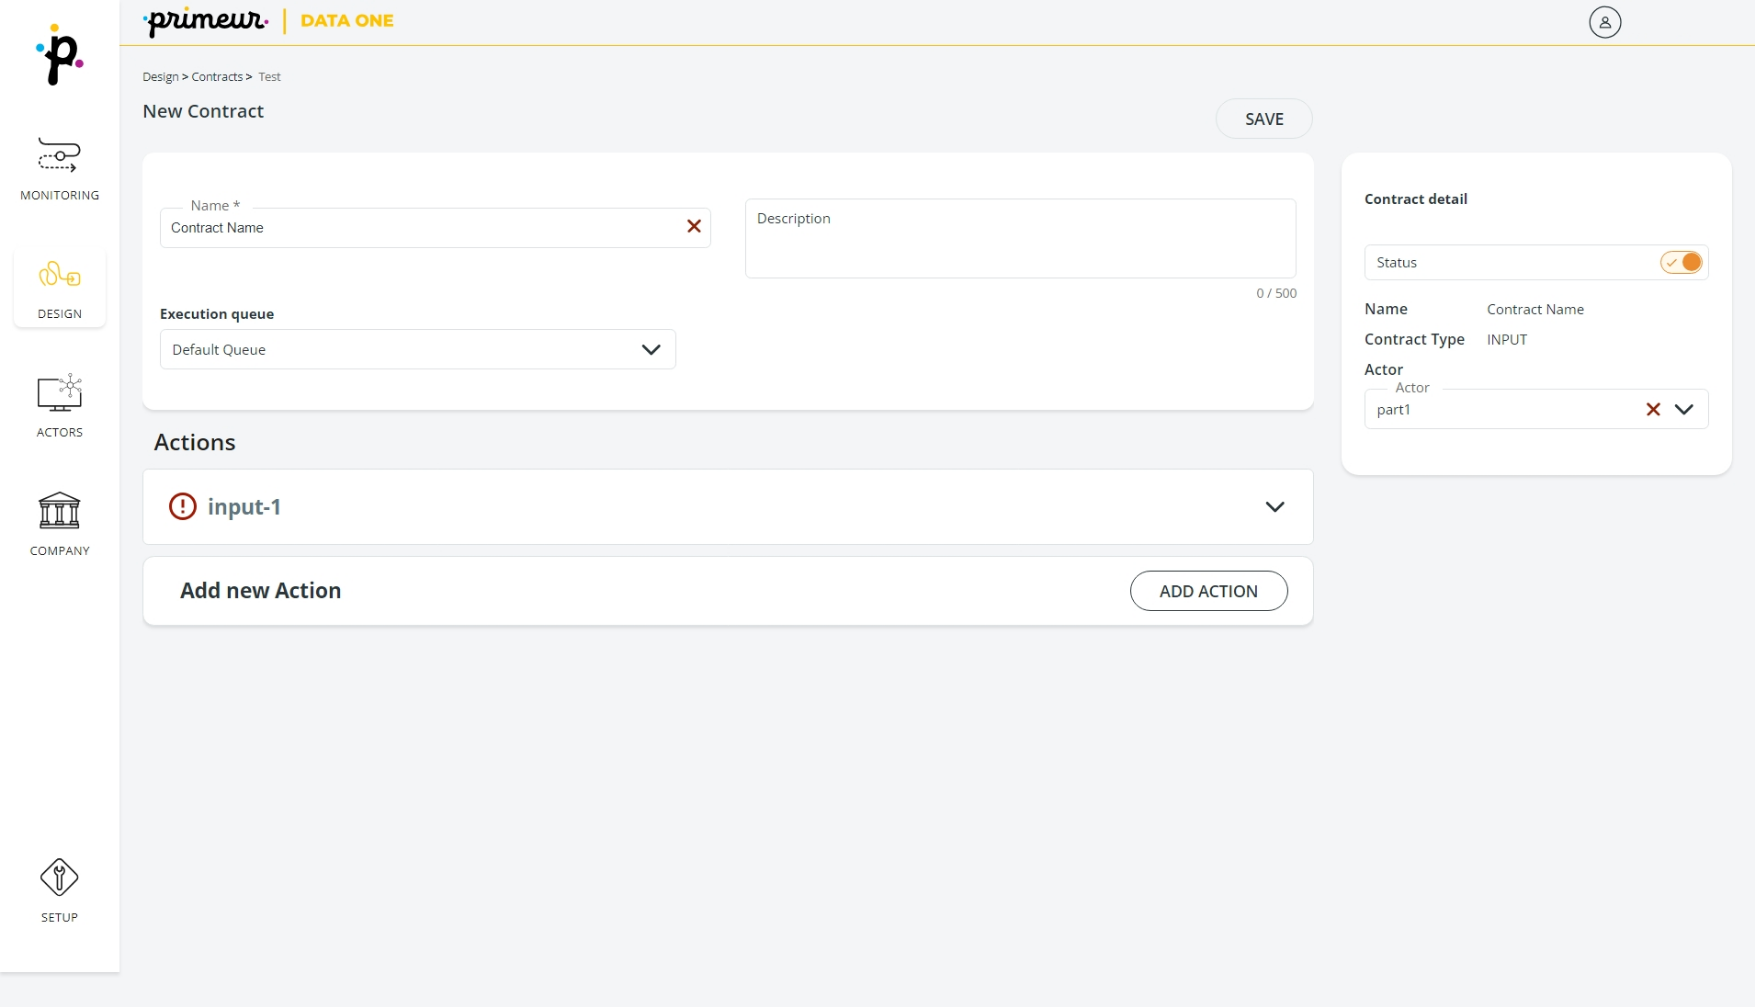
The **New Contract** page contains several sections, as shown in the figure below:
In the panel at the top of the page, you can edit the **Name, Description,** and **Execution Queue** of the Contract.
The **Name, Status, Contract type**, and **Actor** associated with your contract are displayed in the panel on the right of the page. The status of the contract will appear as **ENABLED**. The toggle button cannot be set to DISABLED if the Contract is associated with an active FEL. The status of the contract is also shown in the Contracts column of the Contracts page. You can change the actor associated with the contract by selecting one of the entries in the Actor drop-down menu.
The **Action** selected in the wizard will appear in the Actions section of this page. The icon next to the Action Name signals that action variables have not been configured yet. To configure the action variables, click on the icon to expand the Action row.
Fill in the action variables, setting mandatory and optional parameters. For the detailed list of all the variables associated with **System and Error Workflow templates** refer to the [Workflow templates for input contracts](/data-mover-1.21/workflow-templates/system-workflow-templates/workflow-templates-for-input-contracts.md) and [Error handling workflow templates](/data-mover-1.21/workflow-templates/error-handling-workflow-templates.md) pages. As a general rule, the variable name and/or the description of the variable in the workflow template and in the input contract action are the same. For example:
* workflow template: system\_newFile\_push → variable: spPush\_transferProfile → description: Transfer Profile used for Pushing the file onto the remote path.
* input contract action → variable: Select remote server → description: Transfer Profile used for Pushing the file onto the remote path.
Once all the variables are set, this icon will appear next to the **Action Name**, and the Status of the Contract will change to READY.\
\
You can add a new Action by clicking the button below the Action variables row.
---
# Agent Instructions: Querying This Documentation
If you need additional information that is not directly available in this page, you can query the documentation dynamically by asking a question.
Perform an HTTP GET request on the current page URL with the `ask` query parameter:
```
GET https://docs.primeur.com/data-mover-1.21/contracts/create-your-first-contract/create-an-input-contract.md?ask=
```
The question should be specific, self-contained, and written in natural language.
The response will contain a direct answer to the question and relevant excerpts and sources from the documentation.
Use this mechanism when the answer is not explicitly present in the current page, you need clarification or additional context, or you want to retrieve related documentation sections.
 icon to expand the Action row.
Fill in the action variables, setting mandatory and optional parameters. For the detailed list of all the variables associated with **System and Error Workflow templates** refer to the [Workflow templates for input contracts](/data-mover-1.21/workflow-templates/system-workflow-templates/workflow-templates-for-input-contracts.md) and [Error handling workflow templates](/data-mover-1.21/workflow-templates/error-handling-workflow-templates.md) pages. As a general rule, the variable name and/or the description of the variable in the workflow template and in the input contract action are the same. For example:
* workflow template: system\_newFile\_push → variable: spPush\_transferProfile → description: Transfer Profile used for Pushing the file onto the remote path.
* input contract action → variable: Select remote server → description: Transfer Profile used for Pushing the file onto the remote path.
Once all the variables are set, this icon
icon to expand the Action row.
Fill in the action variables, setting mandatory and optional parameters. For the detailed list of all the variables associated with **System and Error Workflow templates** refer to the [Workflow templates for input contracts](/data-mover-1.21/workflow-templates/system-workflow-templates/workflow-templates-for-input-contracts.md) and [Error handling workflow templates](/data-mover-1.21/workflow-templates/error-handling-workflow-templates.md) pages. As a general rule, the variable name and/or the description of the variable in the workflow template and in the input contract action are the same. For example:
* workflow template: system\_newFile\_push → variable: spPush\_transferProfile → description: Transfer Profile used for Pushing the file onto the remote path.
* input contract action → variable: Select remote server → description: Transfer Profile used for Pushing the file onto the remote path.
Once all the variables are set, this icon  button below the Action variables row.
---
# Agent Instructions: Querying This Documentation
If you need additional information that is not directly available in this page, you can query the documentation dynamically by asking a question.
Perform an HTTP GET request on the current page URL with the `ask` query parameter:
```
GET https://docs.primeur.com/data-mover-1.21/contracts/create-your-first-contract/create-an-input-contract.md?ask=
button below the Action variables row.
---
# Agent Instructions: Querying This Documentation
If you need additional information that is not directly available in this page, you can query the documentation dynamically by asking a question.
Perform an HTTP GET request on the current page URL with the `ask` query parameter:
```
GET https://docs.primeur.com/data-mover-1.21/contracts/create-your-first-contract/create-an-input-contract.md?ask=